Booking on behalf of a parent – Staff Session
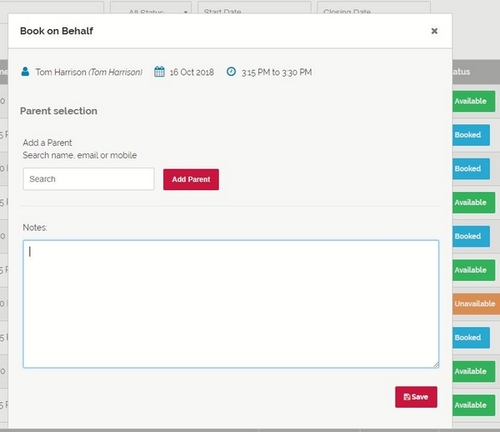
Please use the following process to book one of your available timeslots on a parent’s behalf.
- Log in to your Session via the Session URL (web address).
- Navigate to Account and select My Sessions.
- Click View Session.
- Navigate to the Availability tab.
- Find an Available time slot and click the Plus icon.
- Search for the parent and click Add Parent.
Note: The parent must be a contact in your Schoolzine account. - Add any notes you require for the booking.
- Click Save.
Booking on behalf of a parent – Student Session
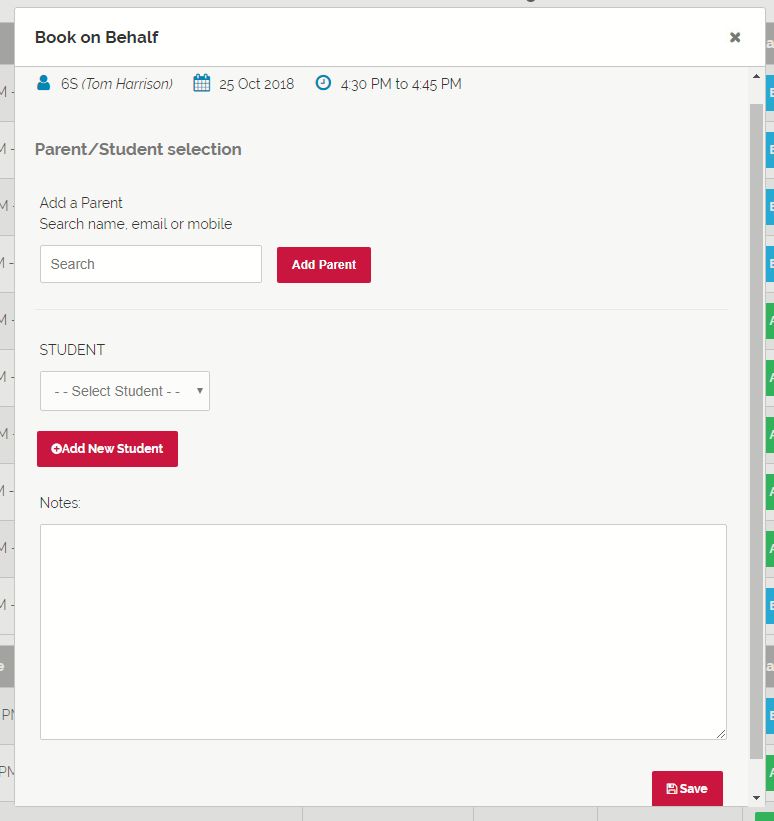
Please use the following process to book one of your available timeslots on a parent’s behalf.
- Log in to your Session via the Session URL (web address).
- Navigate to Account and select My Sessions.
- Click View Session.
- Navigate to the Availability tab.
- Find an Available time slot and click the Plus icon.
- Search for the parent and click Add Parent.
Note: The parent must be a contact in your Schoolzine account. - Select a Student.
- Add any notes you require for the booking.
- Click Save.
Exporting Bookings
- Log in to your Session via the Session URL (web address).
- Navigate to Account and select My Sessions.
- Click View Session.
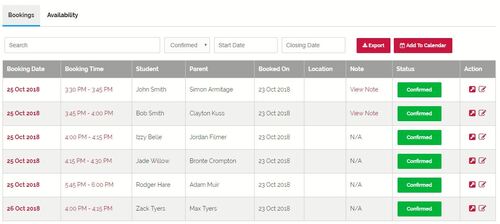
- Click the Export button in the top right-hand corner.
Note: You can use the Start Date and Closing Date to export a specific date range.
Making a Time Slot Unavailable
- Log in to your Session via the Session URL (web address).
- Navigate to Account and select My Sessions.
- Click View Session.
- Navigate to the Availability tab.
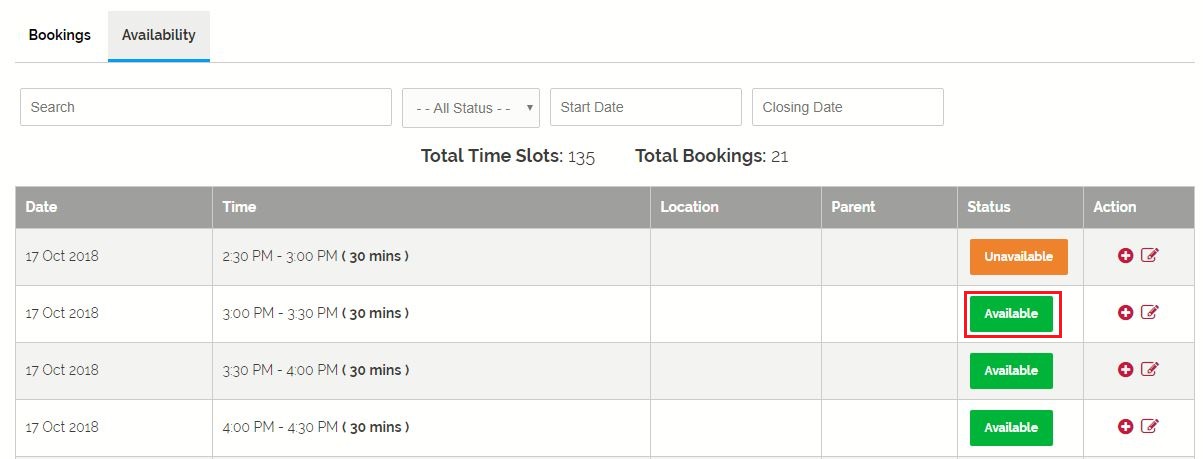
- Find an Available time slot and click on the Available This will change the Time Slot to be Unavailable.
Cancelling a Booking
- Log in to your Session via the Session URL (web address).
- Click View Session.
- Find a confirmed appointment you wish cancel and click the Edit Pencil Tool in the Action column.
- Change the Status field to Cancelled and click Save.
Note: This will send the staff member and Parent a booking cancellation email.
Adding Available Time Slots
- Log in to your Session via the Session URL (web address).
- Navigate to Account and select My Sessions.
- Click View Session.
- Navigate to the Availability tab.
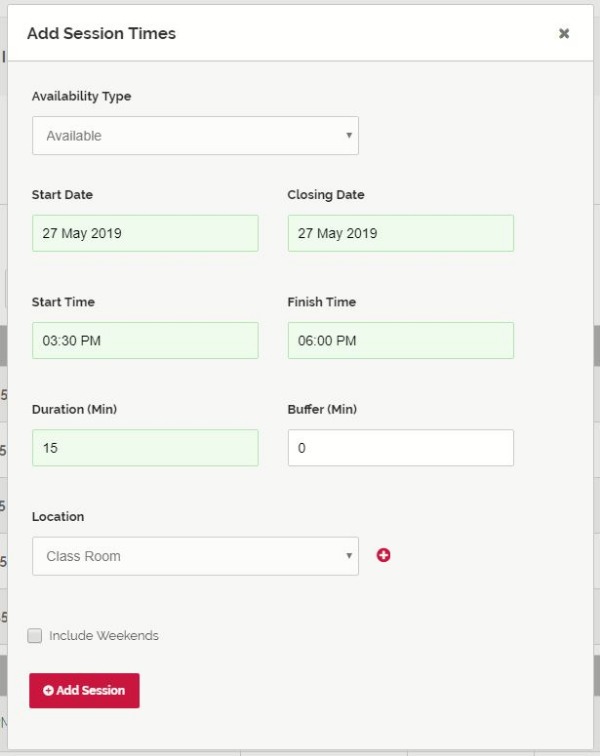
- Click Add Session Times.
- Select the Availability Type.
Note: Selecting Break will make the time slot unavailable for booking. - Select the Start Date and Closing Date.
- Select the Start Time and Finish Time.
- Select the Duration of each available time slot.
- Add or attach an existing Location to the booking session. (optional)
- Click Add Session.
Attendants
An Attendant is the person who has made a booking. Attendants can be marked as attended or cancelled. Also, you can add a new attendant if required.
Marking as attended
- Log in to your Session via the Session URL (web address).
- Navigate to Account and select My Sessions.
- Click View Session.
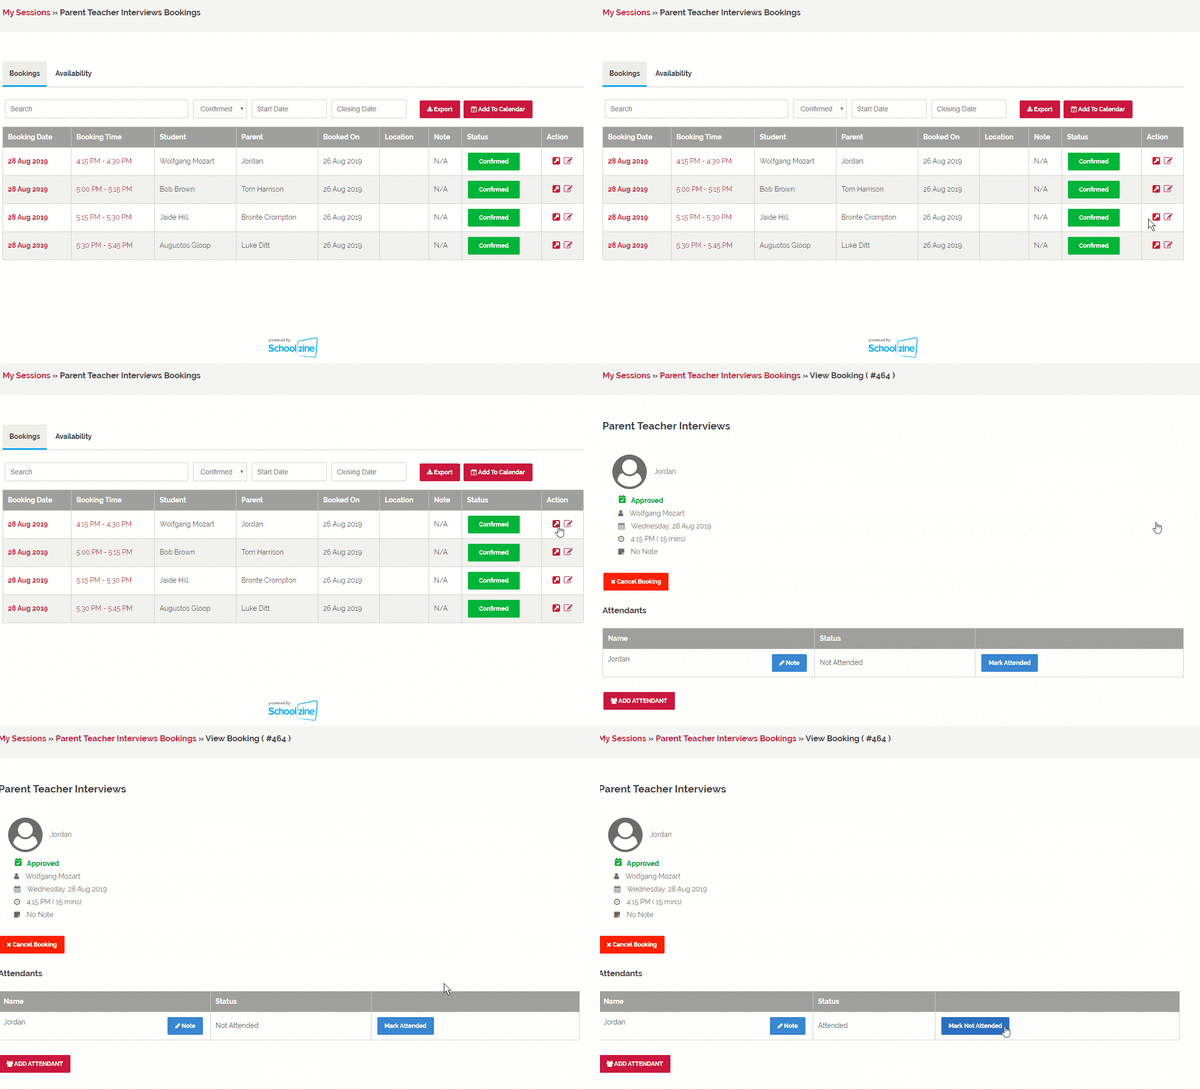
- Click on the arrow icon to view the booking.
- Click on the Mark Attended button.
Cancelling an Attendant
- Log in to your Session via the Session URL (web address).
- Navigate to Account and select My Sessions.
- Click View Session.
- Click on the arrow icon to view the booking.
- Click on the Cancel Booking button.
Adding an Attendant
- Log in to your Session via the Session URL (web address).
- Navigate to Account and select My Sessions.
- Click View Session.
- Click on the arrow icon to view the booking.
- Click the Add Attendant button.
- Then search for the contact and tick the box, then click ADD.
Managing Your Bookings – Video Tutorial
Please watch the tutorial below on how to mange your session bookings.
